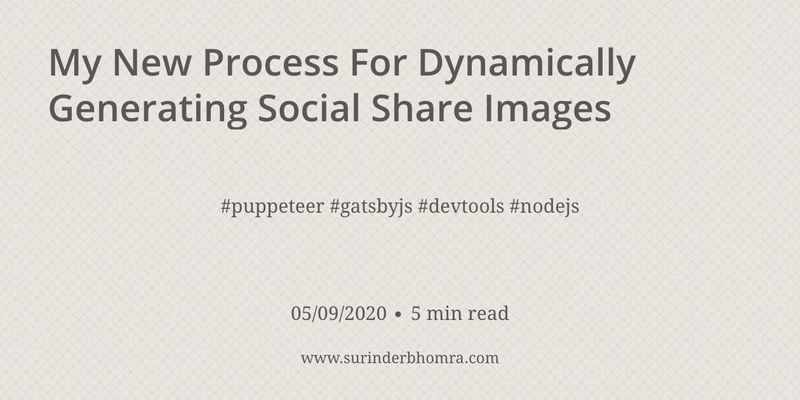
My New Process For Dynamically Generating Social Share Images
- Published on
- -4 min read

I’ll be the first to admit that I very rarely (if at all!) assign a nice pretty share image to any post that gets shared on social networks. Maybe it’s because I hardly post what I write to social media in the first place! :-) Nevertheless, this isn’t the right attitude. If I am really going to do this, then the whole process needs to be quick and render a share image that sets the tone before that will hopefully entice a potential reader to click on my post.
I started delving into how my favourite developer site, dev.to, manages to create these really simple text-based share images dynamically. They have a pretty good setup as they’ve somehow managed to generate a share image that contains relevant post related information perfectly, such as:
- Post title
- Date
- Author
- Related Tech Stack Icons
For those who are nosey as I and want to know how dev.to undertakes such functionality, they have kindly written the following post - How dev.to dynamically generates social images.
Since my website is built using the Gatsby framework, I prefer to use a local process to dynamically generate a social image without the need to rely on another third-party service. What's the point in using a third-party service to do everything for you when it’s more fun to build something yourself!
I had envisaged implementing a process that will allow me to pass in the URL of my blog posts to a script, which in turn will render a social image containing basic information about a blog post.
Intro Into Puppeteer
Whilst doing some Googling, one tool kept cropping up in different forms and uses - Puppeteer. Puppeteer is a Node.js library maintained by Google Chrome’s development team and enables us to control any Chrome Dev-Tools based browser through scripts. These scripts can programmatically execute a variety of actions that you would generally do in a browser.
To give you a bit of an insight into the actions Puppeteer can carry out, check out this Github repo. Here you can see Puppeteer is a tool for testing, scraping and automating tasks on web pages. It’s a very useful tool. The only part I spent most of my time understanding was its webpage screenshot feature.
To use Puppeteer, you will first need to install the library package in which two options are available:
- Puppeteer Core
- Puppeteer
Puppeteer Core is the more lighter-weight package that can interact with any Dev-Tool based browser you already have installed.
npm install puppeteer-core
You then have the full package that also installs the most recent version of Chromium within the node_modules directory of your project.
npm install puppeteer
I opted for the full package just to ensure I have the most compatible version of Chromium for running Puppeteer.
Puppeteer Webpage Screenshot Script
Now that we have Puppeteer installed, I wrote a script and added it to the root of my Gatsby site. The script carries out the following:
- Accepts a single argument containing the URL of a webpage. This will be the page containing information about my blog post in a share format - all will become clear in the next section.
- Approximately screenshot a cropped version of the webpage. In this case 840px x 420px - the exact size of my share image.
- Use the page name in the URL as the image file name.
- Store the screenshot in my "Social Share” media directory.
const puppeteer = require('puppeteer');

// If an argument is not provided containing a website URL, end the task.
if (process.argv.length !== 3) {
  console.log("Please provide a single argument containing a website URL.");
  return;
}

const pageUrl = process.argv[2];

const options = {
    path: `./static/media/Blog/Social Share/${pageUrl.substring(pageUrl.lastIndexOf('/') + 1)}.jpg`,
    fullPage: false,
    clip: {
      x: 0,
      y: 0,
      width: 840,
      height: 420
    }
  };

  (async () => {
    const browser = await puppeteer.launch({headless: false});
    const page = await browser.newPage()
    await page.setViewport({ width: 1280, height: 800, deviceScaleFactor: 1.5 })
    await page.goto(pageUrl)
    await page.screenshot(options)
    await browser.close()
  })();
The script can be run as so:
node puppeteer-screenshot.js http://localhost:8000/socialcard/Blog/2020/07/25/Using-Instagram-API-To-Output-Profile-Photos-In-ASPNET-2020-Edition
I made an addition to my Gatsby project that generated a social share page for every blog post where the URL path was prefixed with /socialcard. These share pages will only be generated when in development mode.
Social Share Page
Now that we have our Puppeteer script, all that needs to be accomplished is to create a nice looking visual for Puppeteer to convert into an image. I wanted some form of automation where blog post information was automatically populated.
I’m starting off with a very simple layout taking some inspiration from dev.to and outputting the following information:
- Title
- Date
- Tags
- Read time
Working with HTML and CSS isn’t exactly my forte. Luckily for me, I just needed to do enough to make the share image look presentable.

You can view the HTML and CSS on JSFiddle. Feel free to update and make it better! If you do make any improvements, update the JSFiddle and let me know!
Next Steps
I plan on adding some additional functionality allowing a blog post teaser image (if one is added) to be used as a background and make things look a little more interesting. At the moment the share image is very plain. As you can tell, I keep things really simple as design isn’t my strongest area. :-)
If all goes to plan, when I share this post to Twitter you should see my newly generated share image.
Before you go...
If you've found this post helpful, you can buy me a coffee. It's certainly not necessary but much appreciated!
Leave A Comment
If you have any questions or suggestions, feel free to leave a comment. Your comment will not only help others, but also myself.

